This student UX design project for Madison College was deeply influenced by the COVID-19 pandemic and its impact on our lives. Specifically, I wanted to create an app that encouraged its users to experience nature while being able to connect with each other safely in an interesting and meaningful way. Over the next 16 weeks, I conceptualized, researched, designed, and prototyped my first app in the hopes of achieving that goal. After a semester break, I revisited the project to improve the UI and functionality of the prototype.
Software
Adobe Illustrator | Adobe Photoshop | Adobe XD
Skills
User research | User Experience Design | User Interface Design | Wireframing | Prototyping | Iterative Design | Icon Design
Identify the demographics of users interested in this app
Determine if hypothetical features of the app would be of interest to these target users.
Methodology
The study targeted a sample size of 20 participants online. These participants would be located on Facebook, Instagram, and Reddit through groups or topics involving photography. Each participant would fill out a screener generated in Google Forms. 5 participants would be selected from screening to interview remotely on Instagram, Facebook, or Reddit.
Screener
02 Screening & Interviewing During a Pandemic
Pursuing user research during the COVID-19 pandemic was challenging. The process began with developing and distributing a screening questionnaire to rule out users that would not be interested in using GPS or hiking. This proved to be challenging as I was limited to mostly online sources for users to interview. I used a KWHL chart to guide making my screener. It also was used to develop the script I used to conduct the interviews.
I was met with unexpected opposition when I posted my screener in several hiking Facebook groups. I ultimately pivoted to a group where other students traded screeners for the purpose of UX research. This worked well as the subgroup of individuals fit the hypothesized target audience well. I remotely interviewed interested individuals who passed the screening. I supplemented my user research with interviews with friends and family members.
KWHL Chart
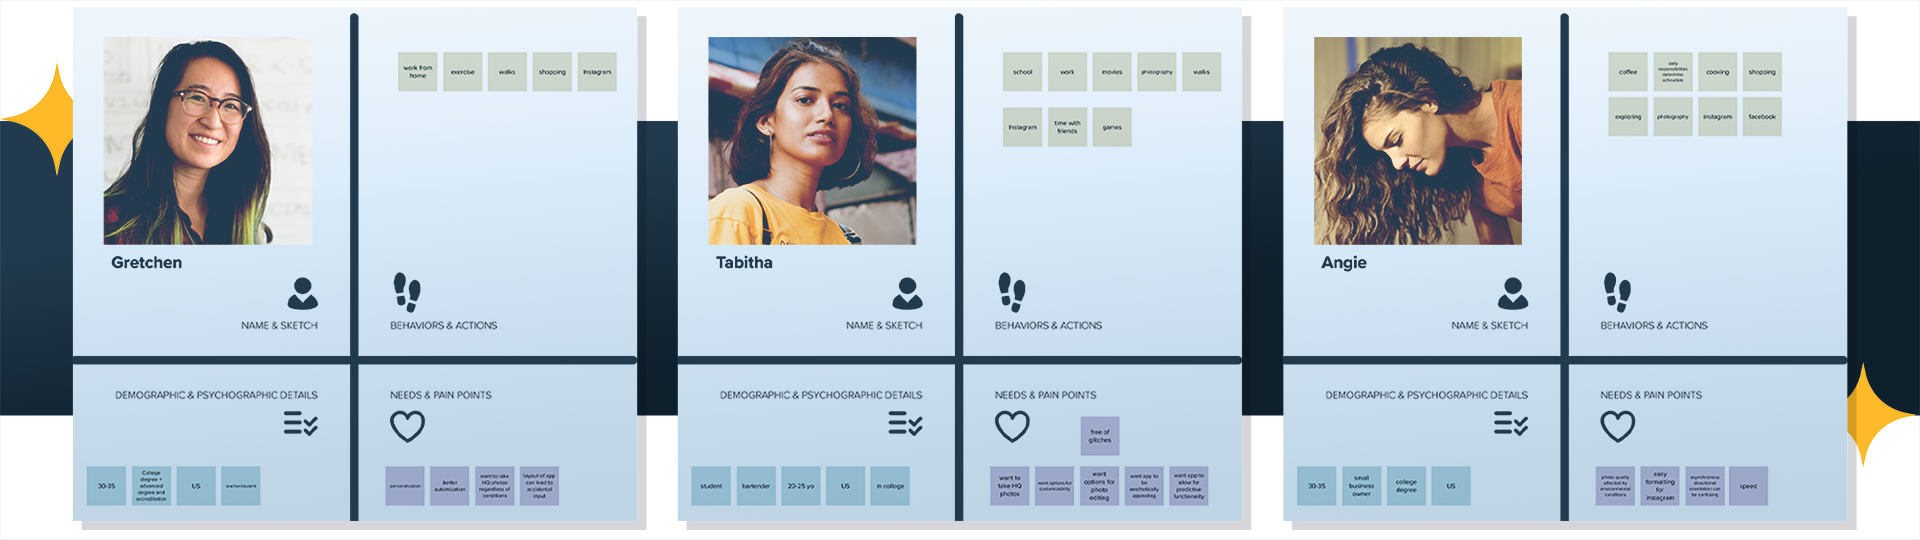
03 Developing Personas
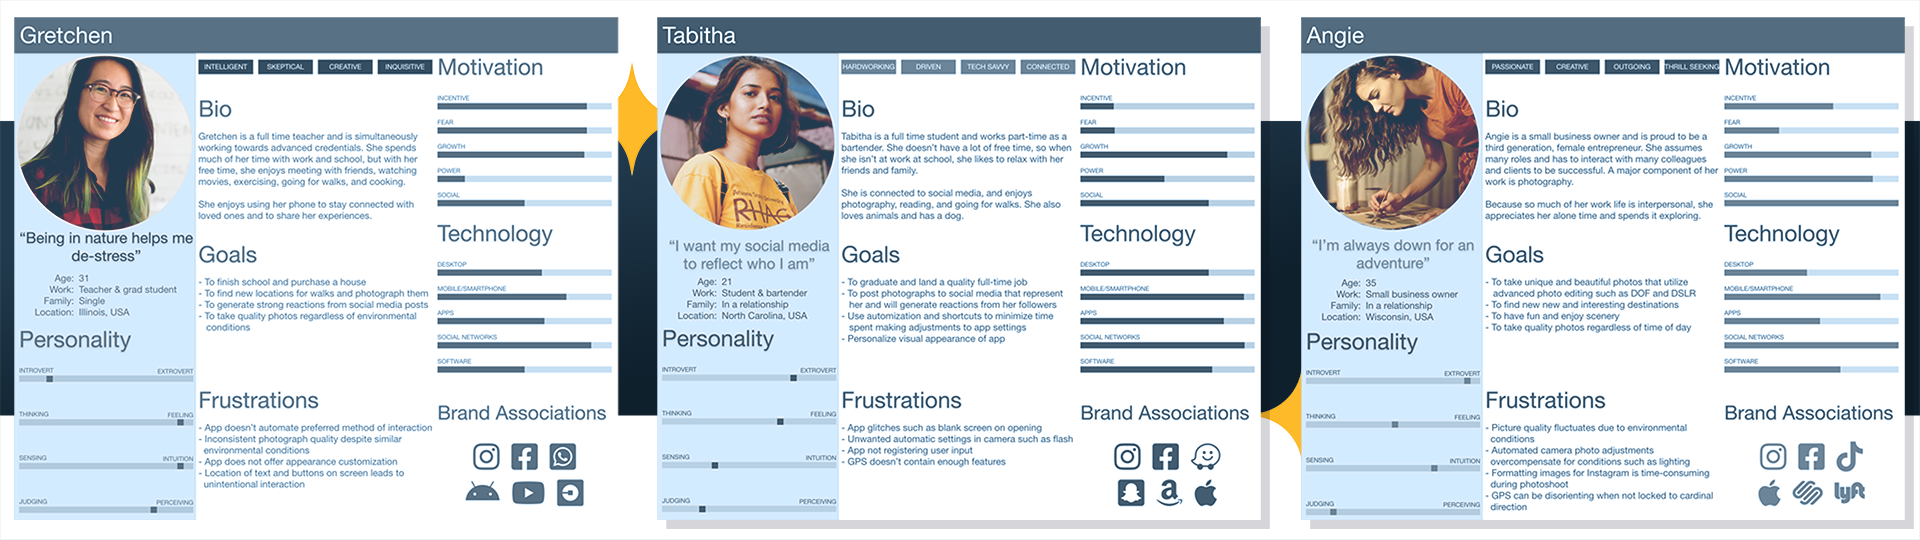
The next step in the process was using the information from user interviews to develop personas. This was done is stages, beginning with creating persona grids in Mural and finishing with fully visualized persona profiles in Adobe XD. I supplemented the information I discovered during researching with details from people I knew to craft the personas I wanted to develop the app for.
Persona Grids
Persona Profiles
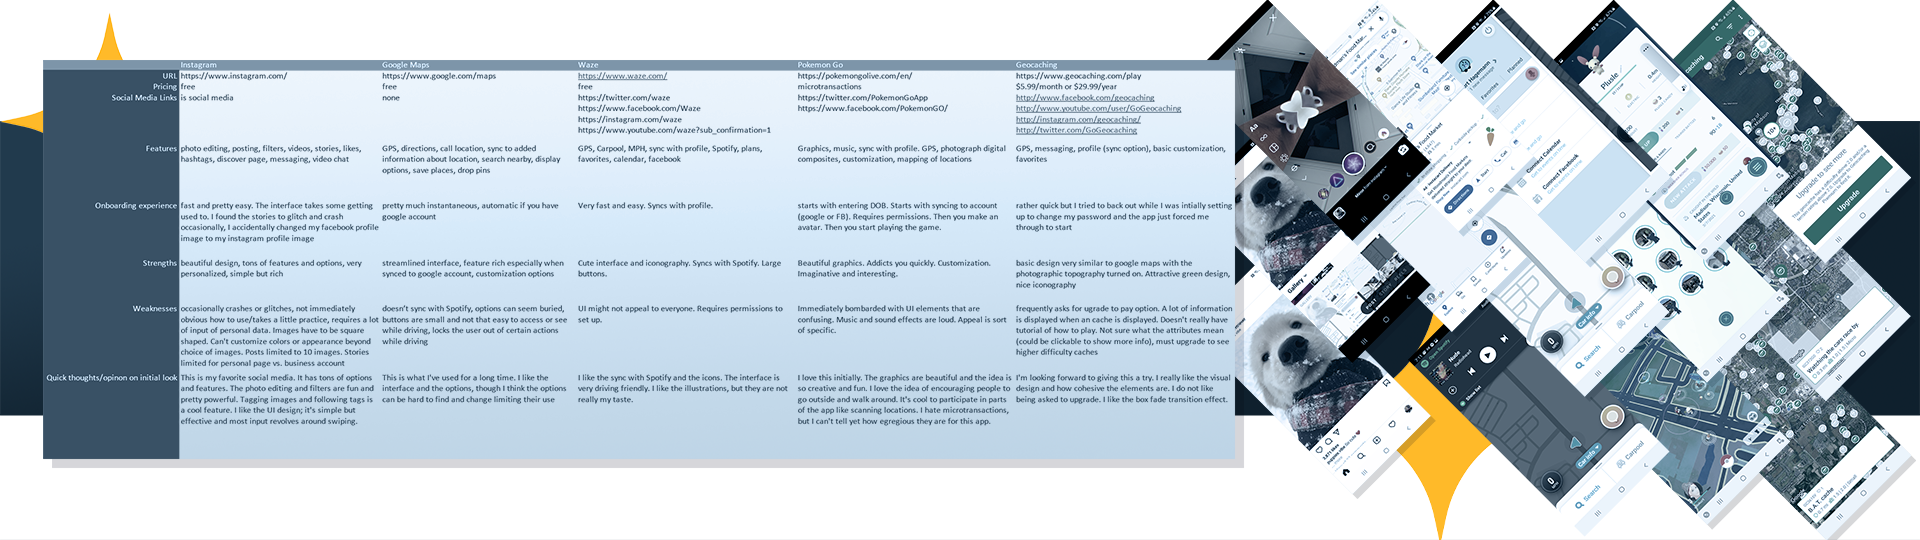
04 Generating an MVP
To begin creating a Minimum Viable Product (MVP), I conducted a competitive analysis of other apps with similar functionality and UI. Next, I created empathy maps for my personas. The purpose of this was to envision how my users would interact with my app to accomplish their goals. It was also to predict and remove any pain points they might endure along the way. I used this information to list the UI requirements that would be necessary for the app to function as intended for its users.
Minimum Viable Product
Competitive Analysis
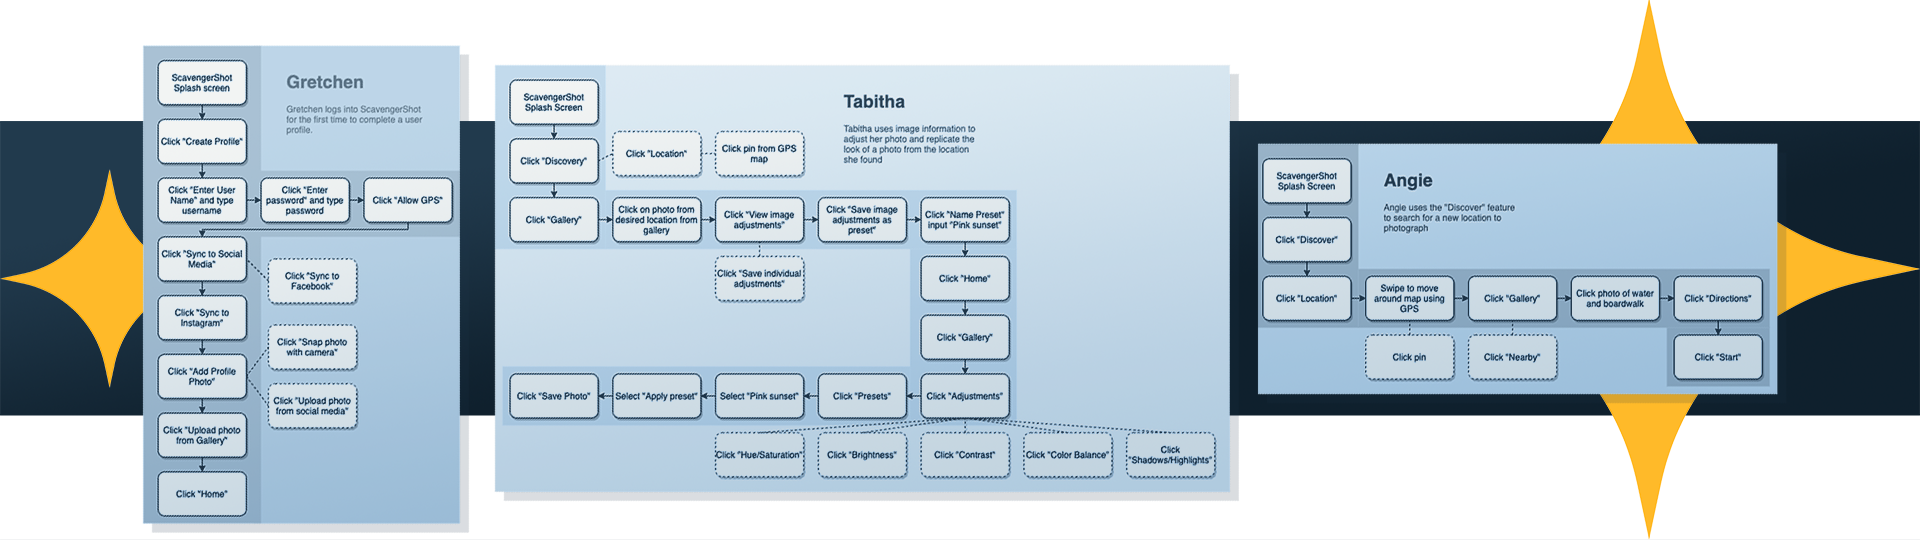
05 User Flows
Using the MVP from the previous phase, I developed user flow diagrams for my personas, which were designed to function as hypothetical use cases. The purpose of this was to envision how the personas would navigate the UI of the app to accomplish specific goals. It is an intermediate step between the MVP and the generation of a low-fidelity prototype.
I used the website Draw.io to make simple paths that illustrated my personas’ navigation through the screens of the app.
User Flows
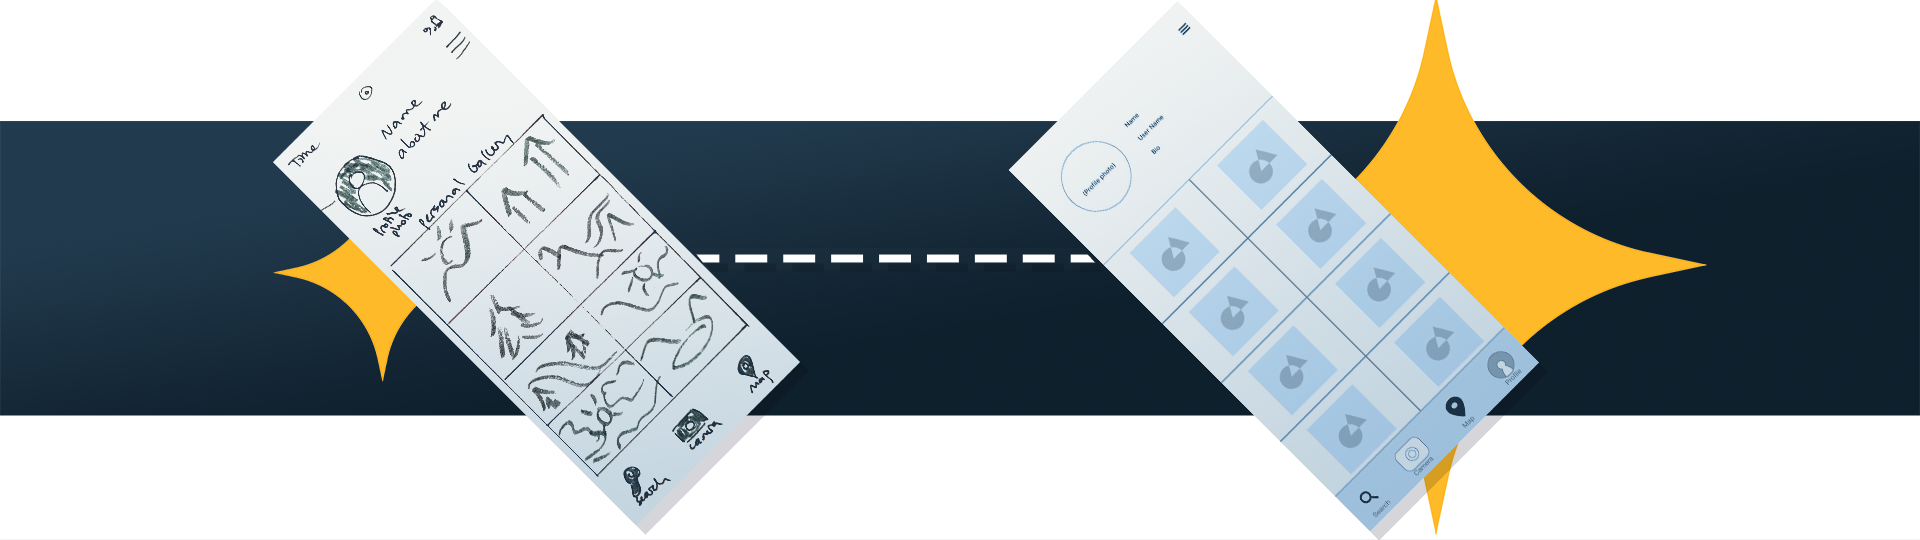
06 Lofi Mockups
For the next step, I generated low-fidelity mockups of the app. The first phase of this process was taking inspiration from UIs of existing apps to sketch on paper what mine would look like. Then, I built these designs digitally in Adobe XD.
Sketch & low-fidelity mockup
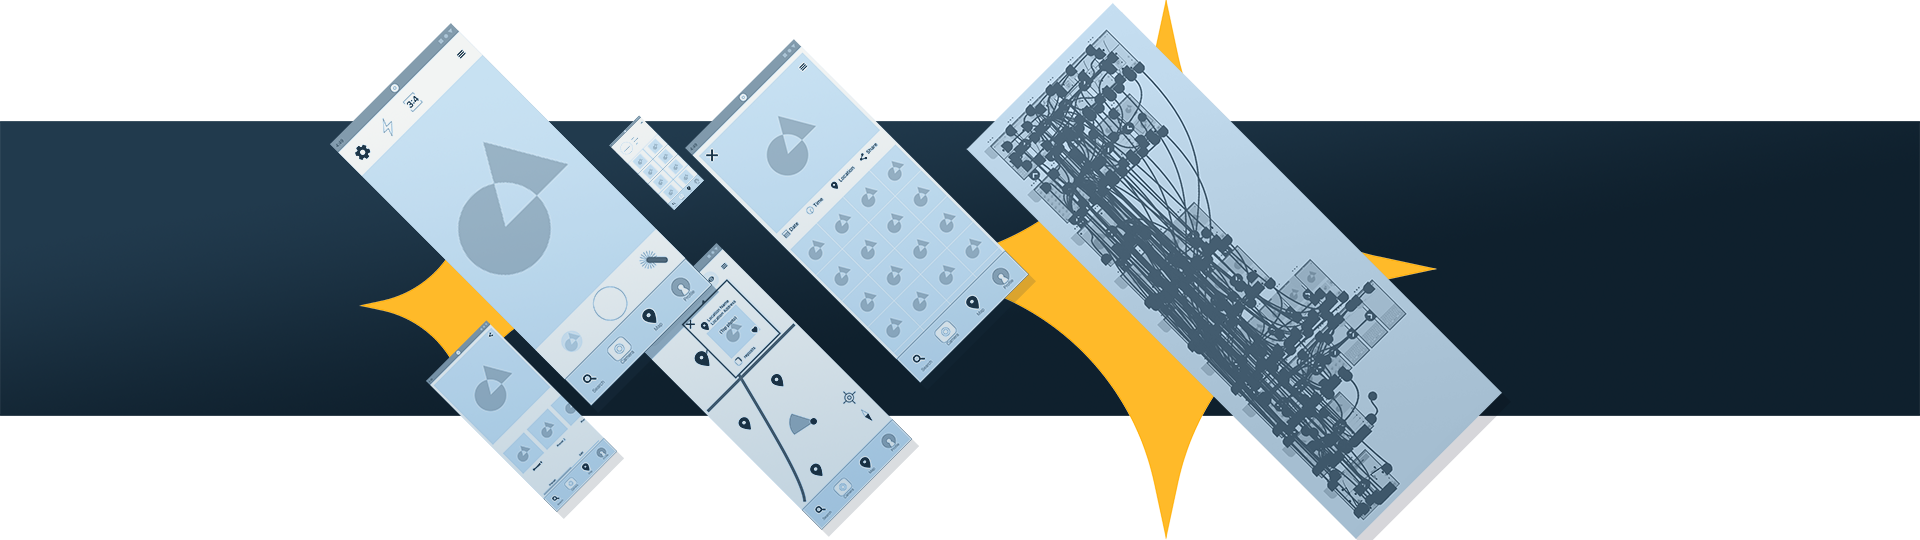
07 Wireframing
Prototyping the app was essentially a part two of the wireframe. I learned how to connect the different elements and components to each other in Adobe XD to simulate the functionality of the final product. I learned during this phase that the more planning you complete before starting, the better.
Prototype screens and wireframe
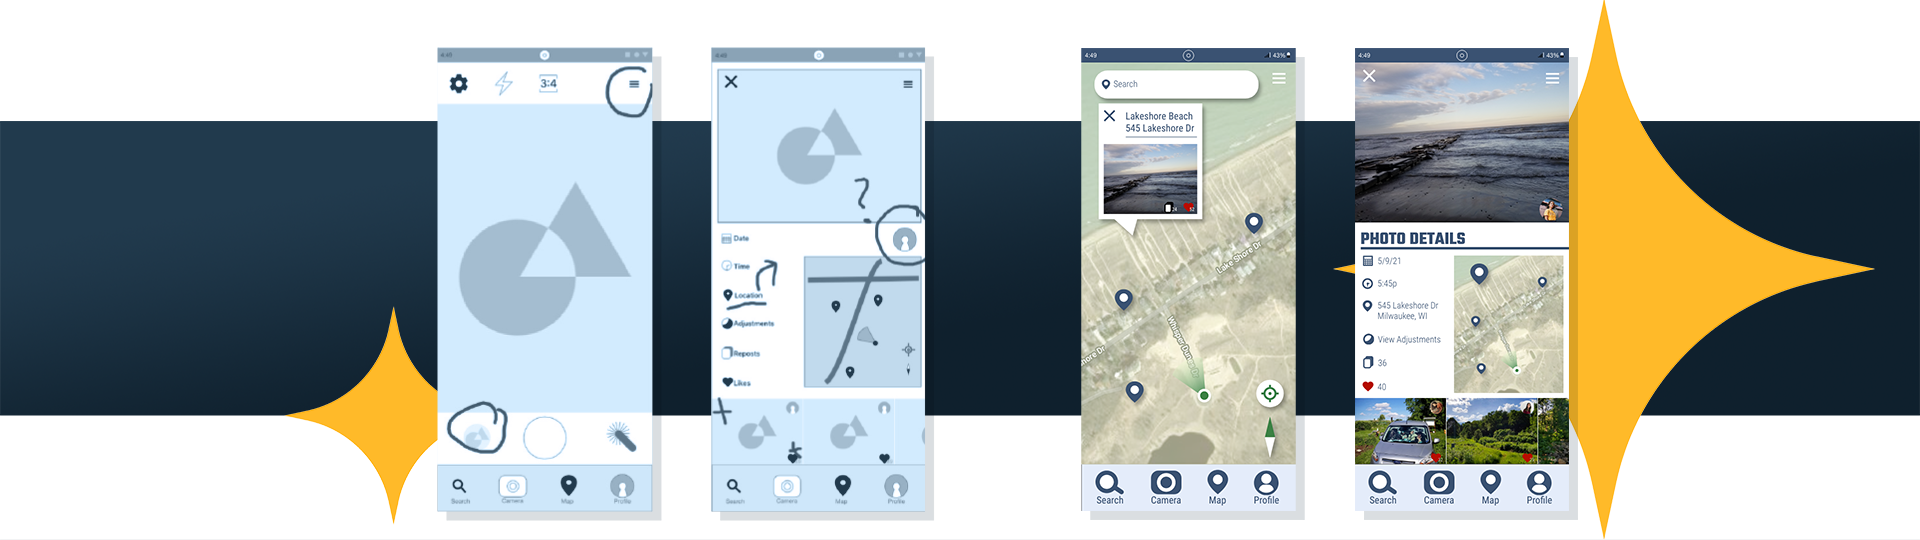
08 HiFi Mockup & User Testing
For the final stage of the initial part of this project, I made high-fidelity mockups of a few screens for my app to show what it may ultimately look like. I also had a user test my app to assess the success of its functionality. For the user testing, I gave my user specific tasks to complete within the prototype and recorded the ease with which they completed the tasks. I recorded this information for use in the next iteration of my app.
User testing results & high-fidelity mockups
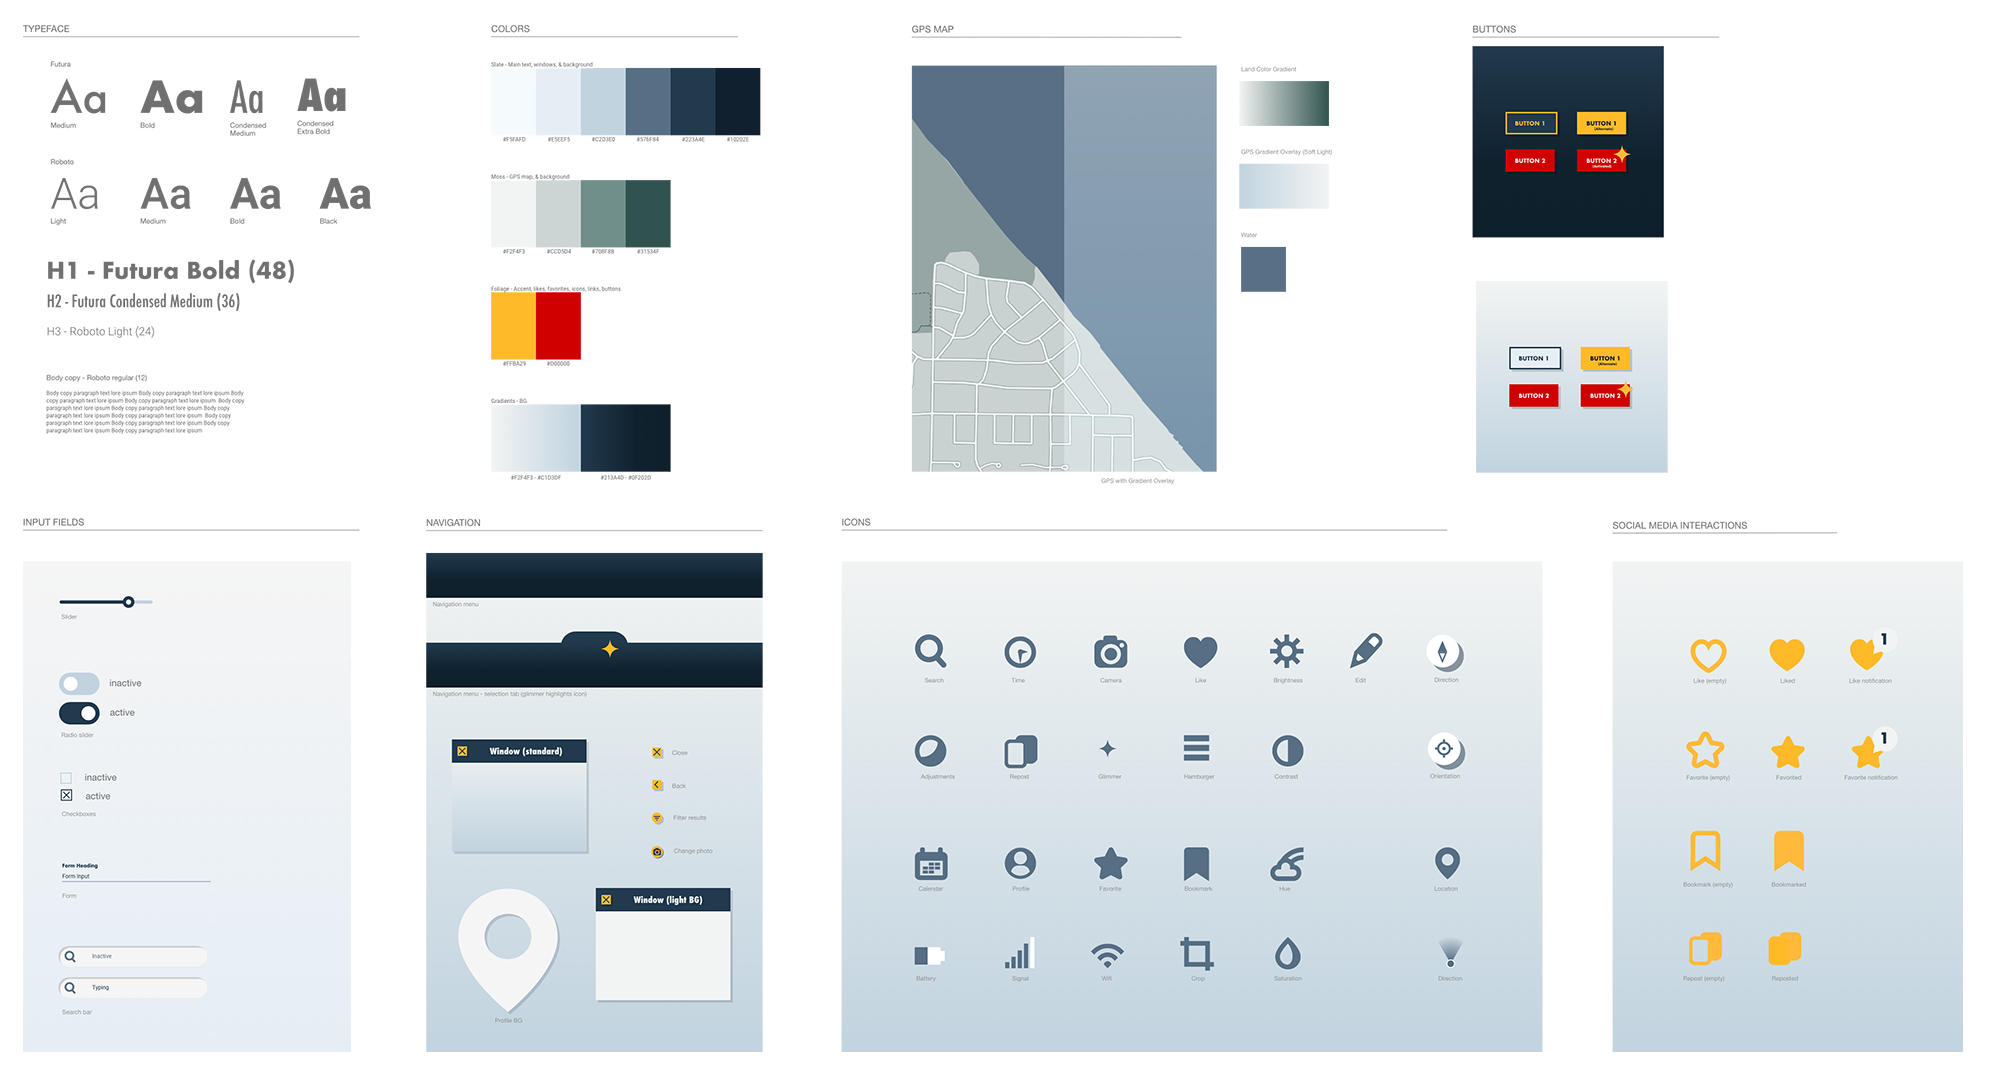
09 Redesigning the UI - Style Guide
I picked this project up a semester later in order to revise and refine the UI. This began with creation of a new style guide that included more cohesive color palette, typography, and graphics. I designed all the UI graphical elements in Adobe Illustrator and assembled the style guide in Adobe XD. I targeted a high contrast, minimalist style to best highlight the photography the app would ultimately include.
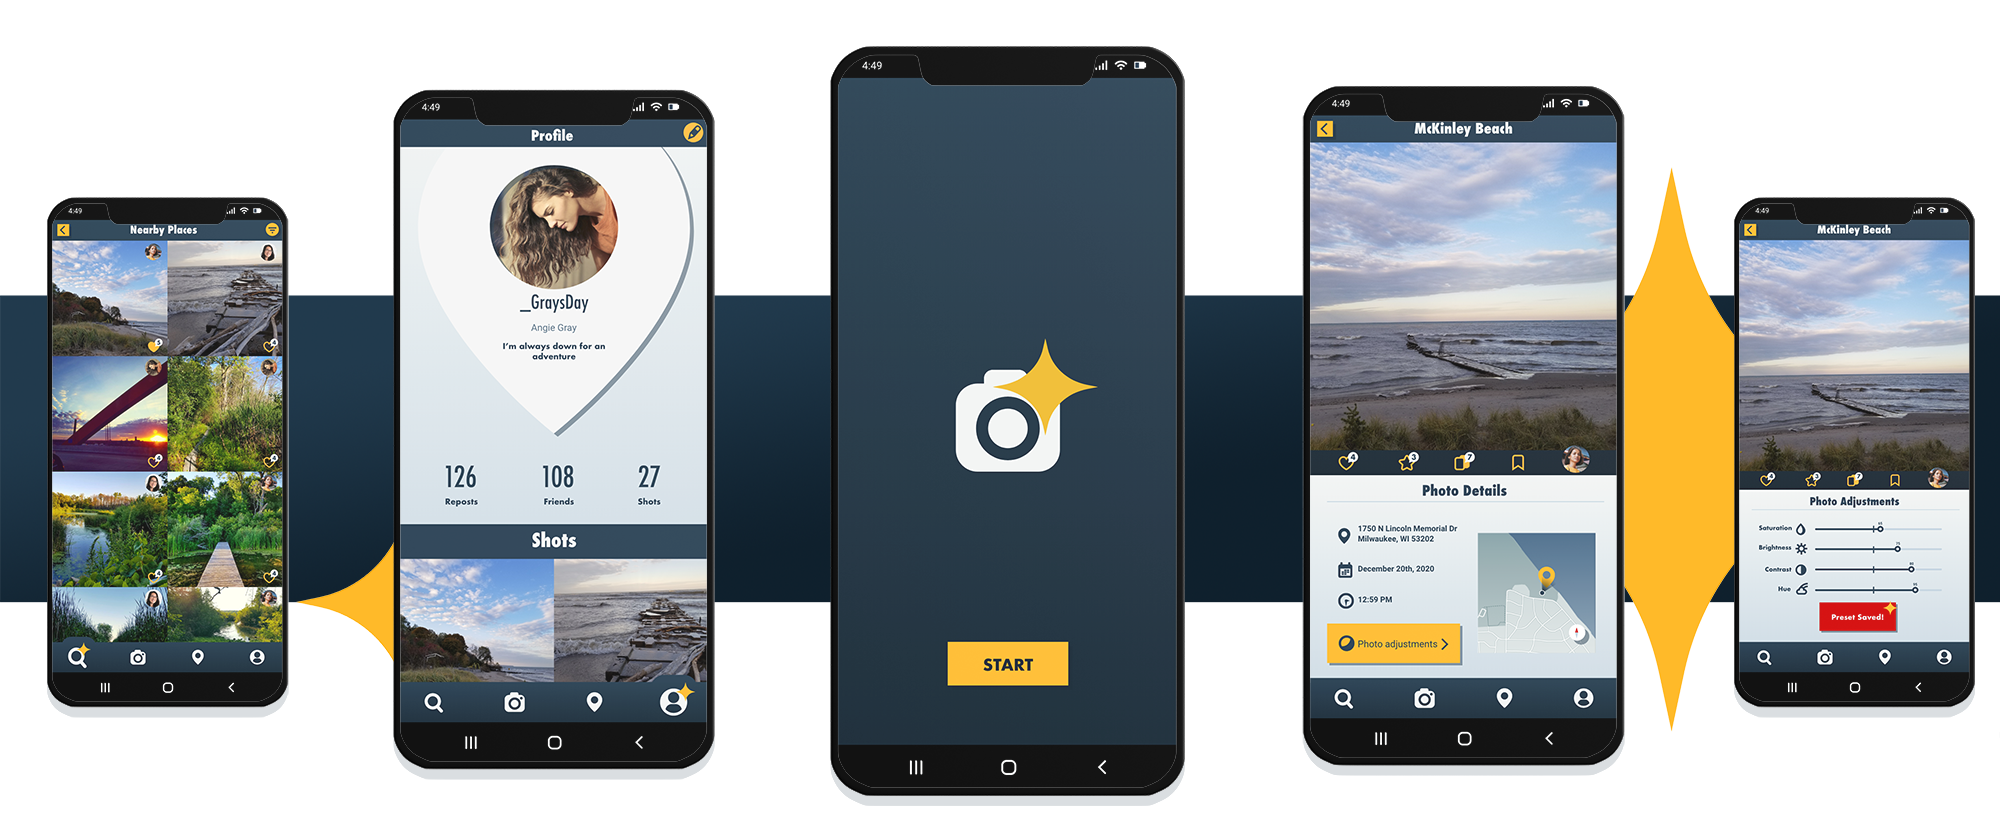
10 Redesigning the UI - Mockup
For the final part of the project, I applied the new design of the style guide to the previous UI. During this process, I also refined the interface itself for improved usability. This was an iterative process where I incorporated a series of rounds of feedback to refine the UI significantly.